| This article applies specifically to organizations using the HRIS Sync integration. |
Overview
SFTP (Secure File Transfer Protocol) is a secure service for sending files over the internet. You can send data directly from SAP SuccessFactors using SFTP. This method utilizes the full file and deletes any rows that are not present in each transfer.
If you want to utilize a manual csv upload, skip to step 2.
Step 1: Configure connection via SFTP
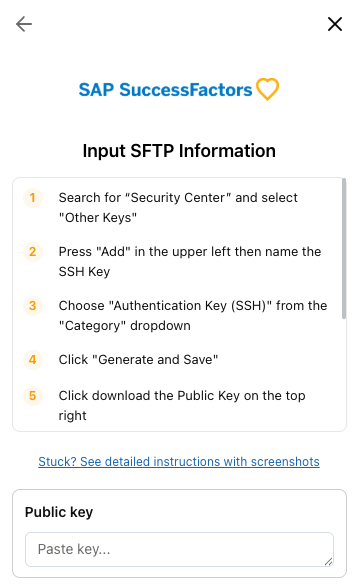
- Search and click “Security Center” and select "Other Keys"
- Press "Add" in the upper left corner then name the SSH Key
- Choose "Authentication Key (SSH)" from the "Category" dropdown
- Click "Generate and Save"
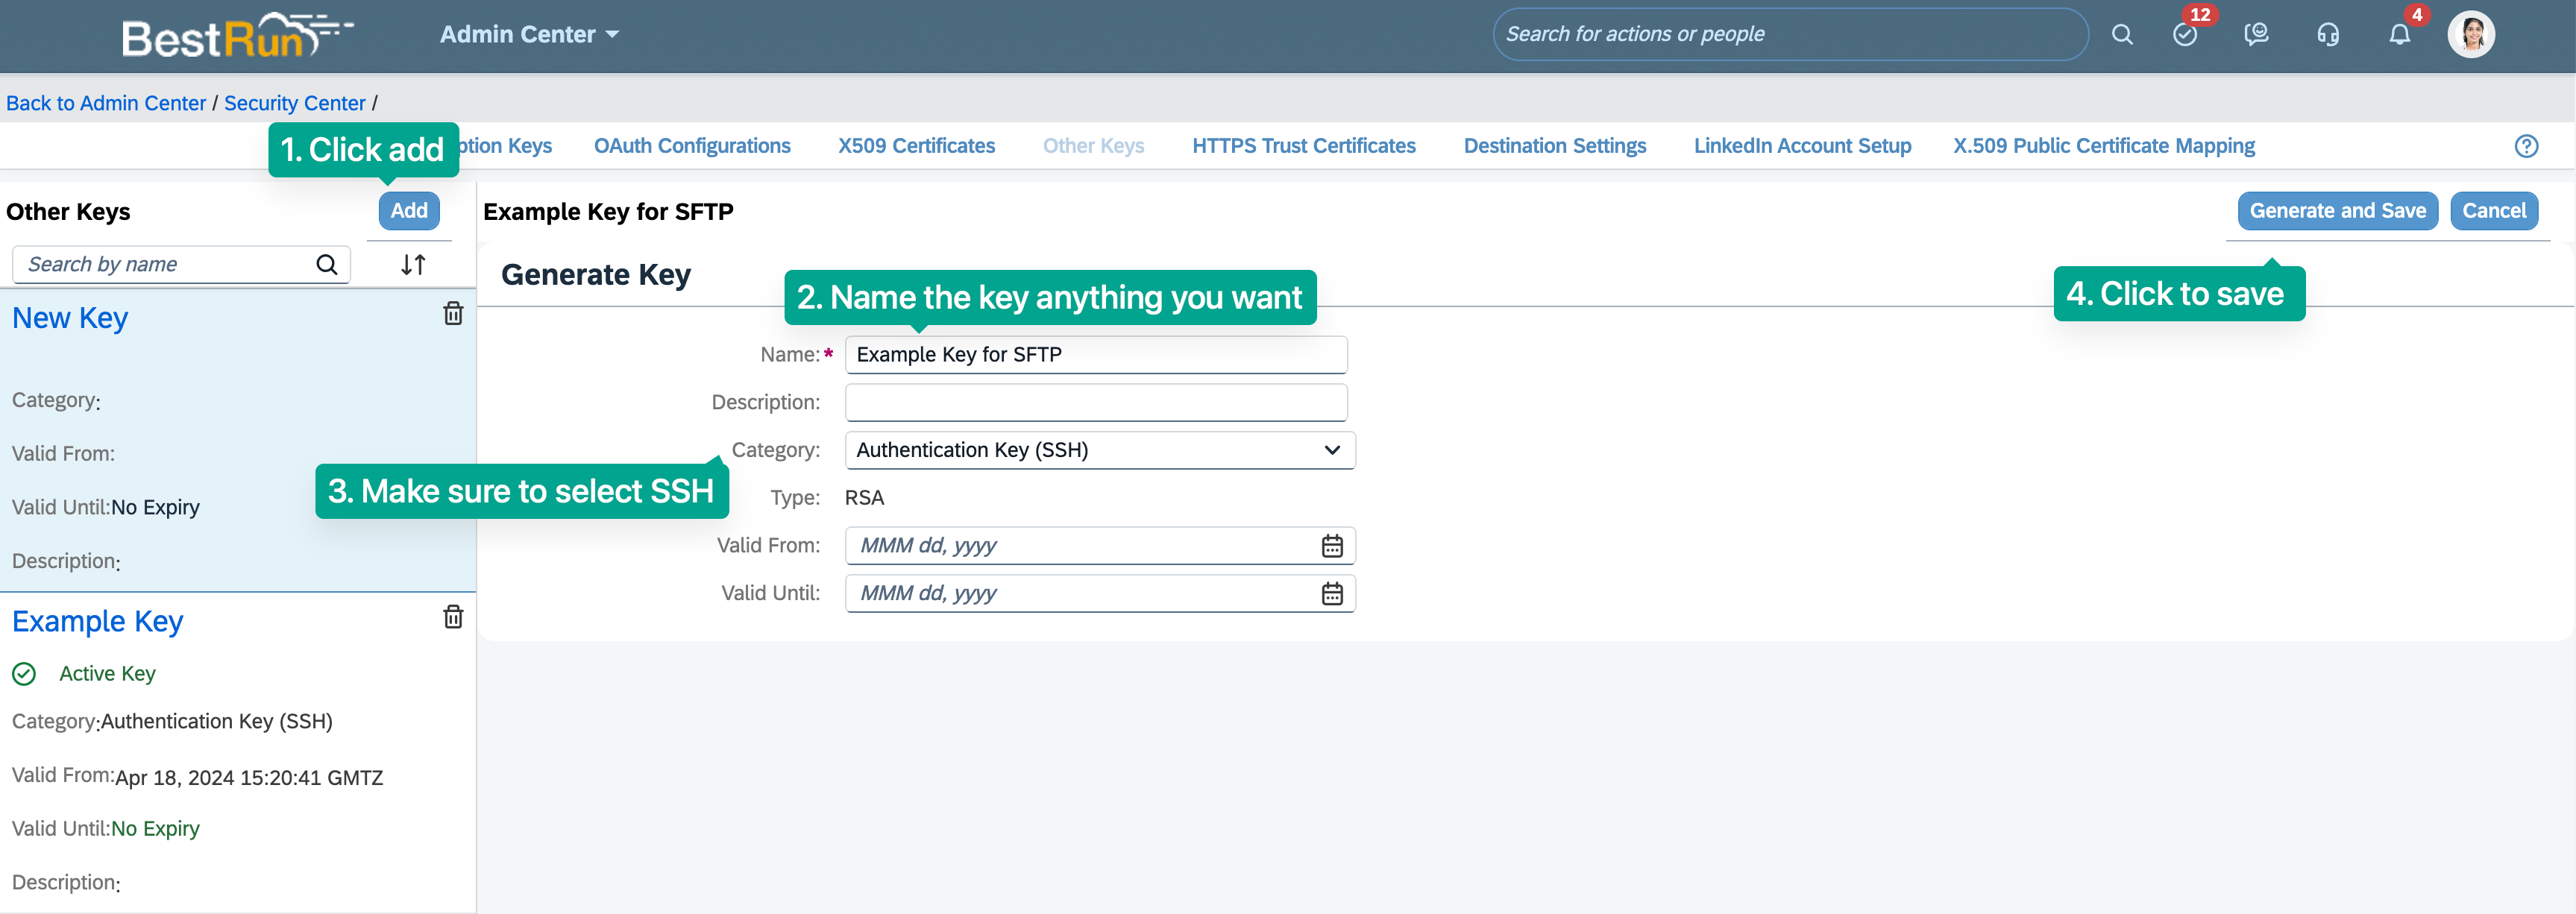
- Download the Public Key from the key instance.
- Locate and right-click the downloaded file, select "Open With"
- Open the file with TextEdit
- Copy the entire SSH Key, including the "---- BEGIN SSH2 PUBLIC KEY ----" to "---- END SSH2 PUBLIC KEY ----" lines
- Paste the key into your Link modal
Step 2: Create a custom report in SAP SuccessFactors
You will be guided on how to create a custom report with fields that you wish to send securely via SFTP. This guide covers how to create Employee information (2a) and Employment information (2b) custom reports.
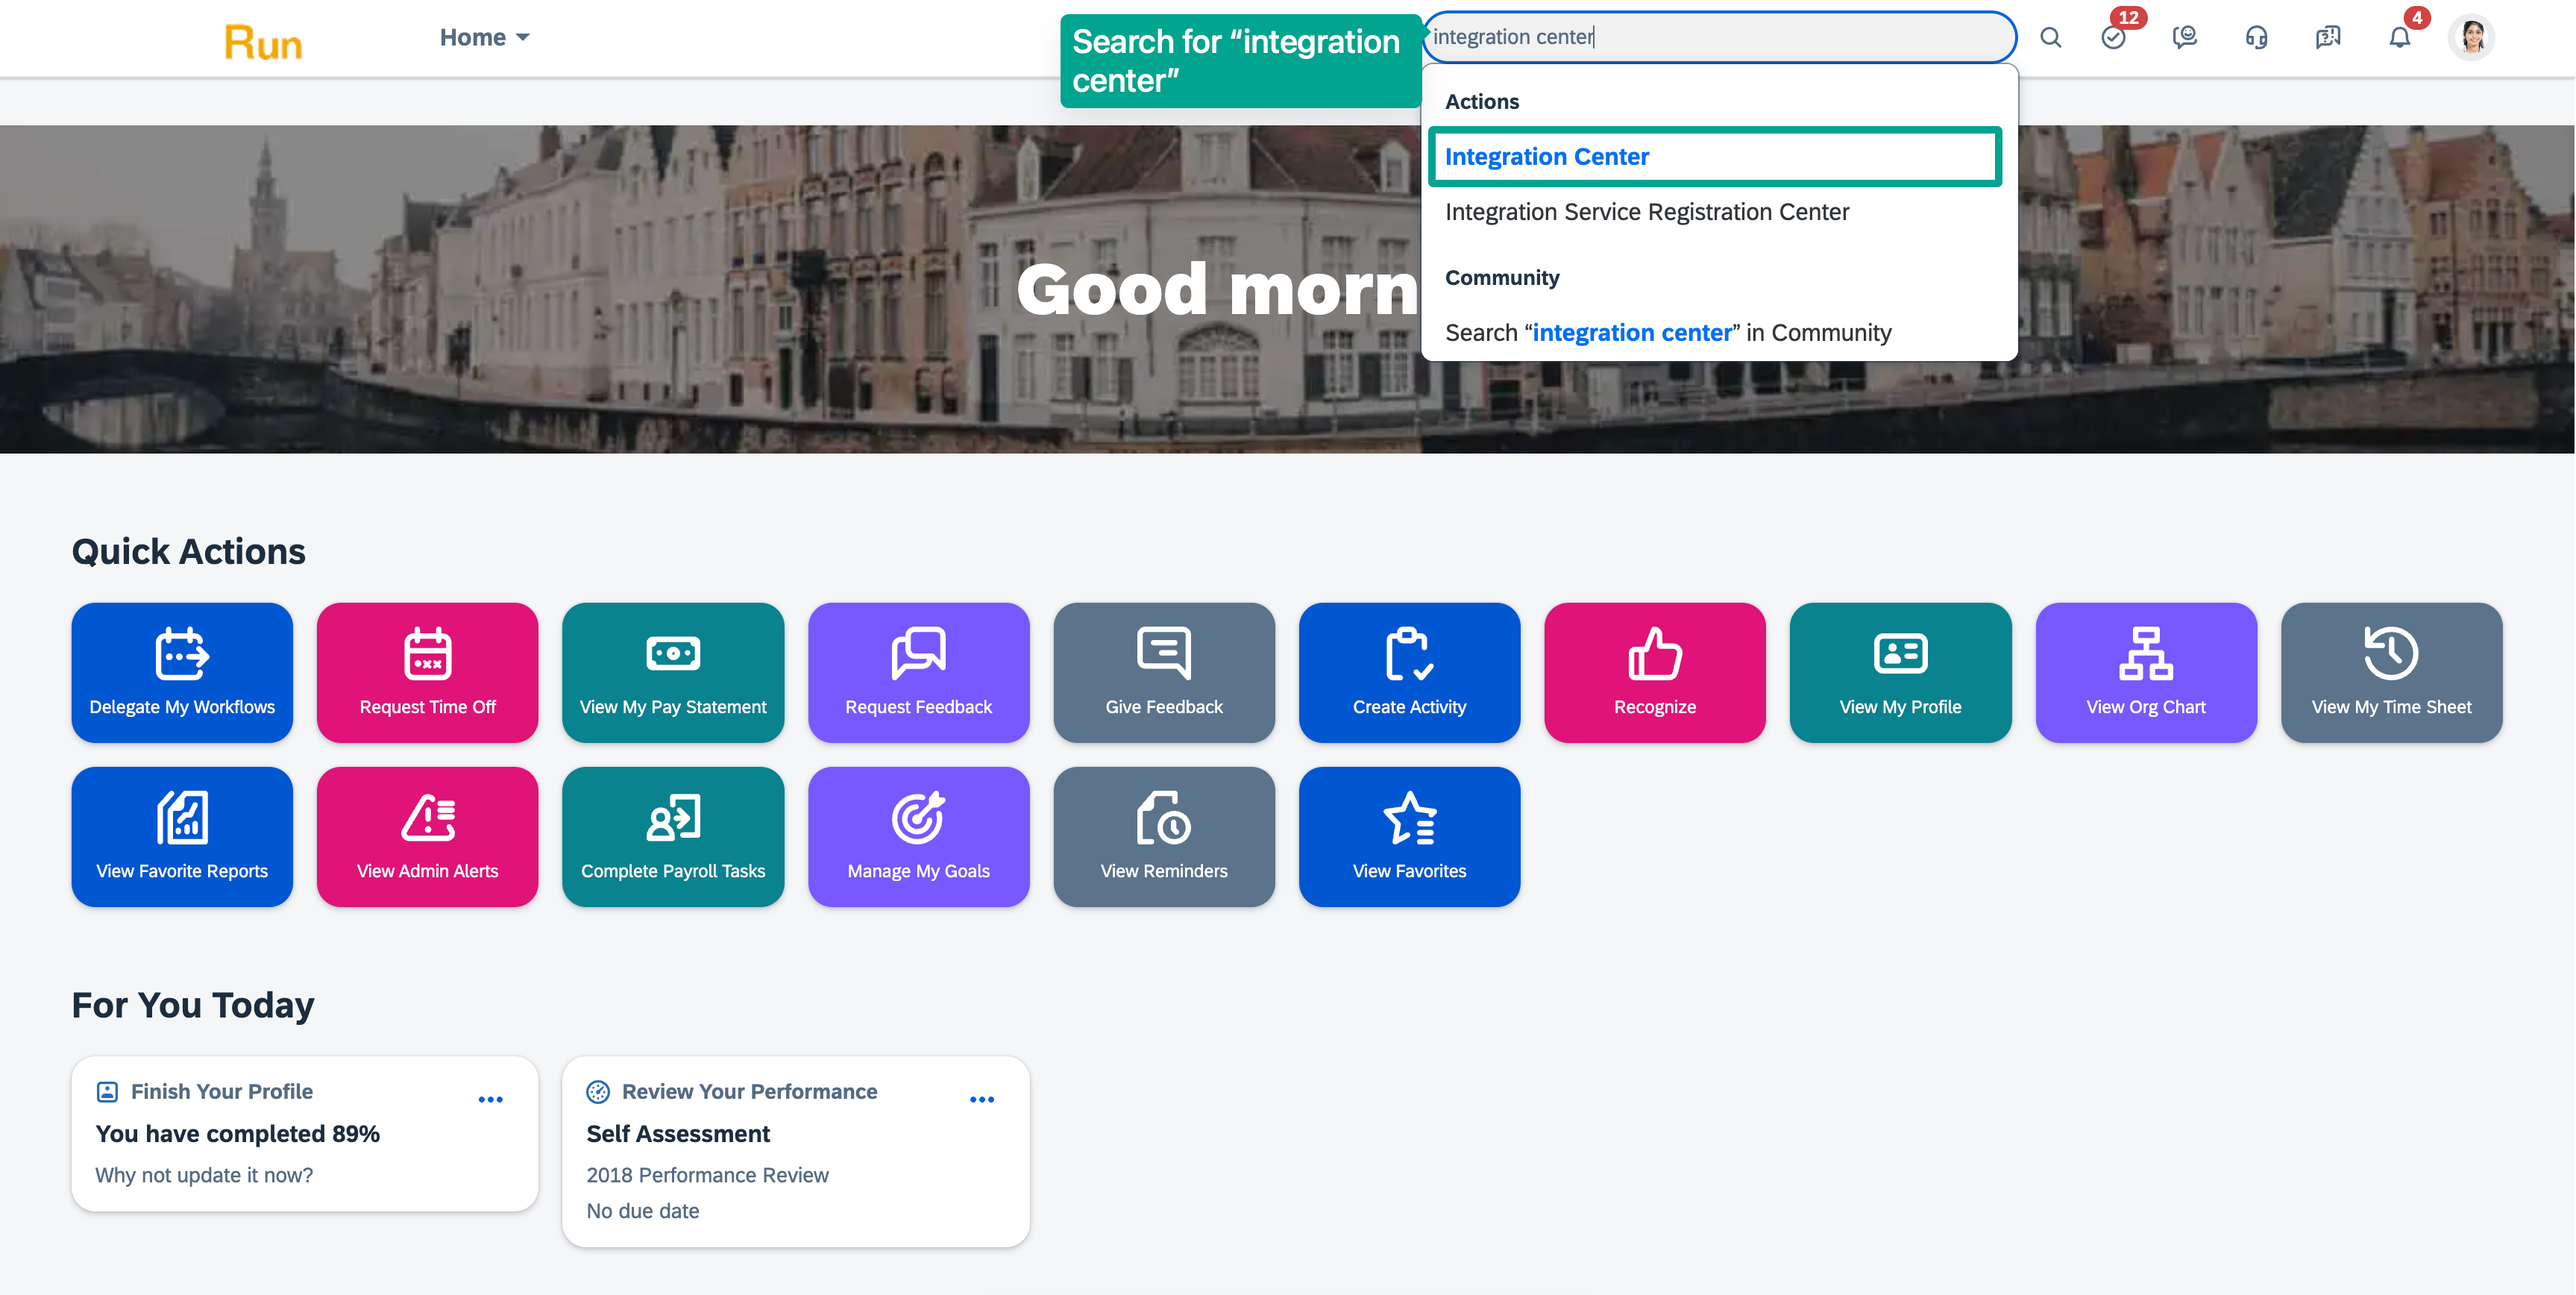
Regardless of which report you are creating, first search and click “Integration Center”
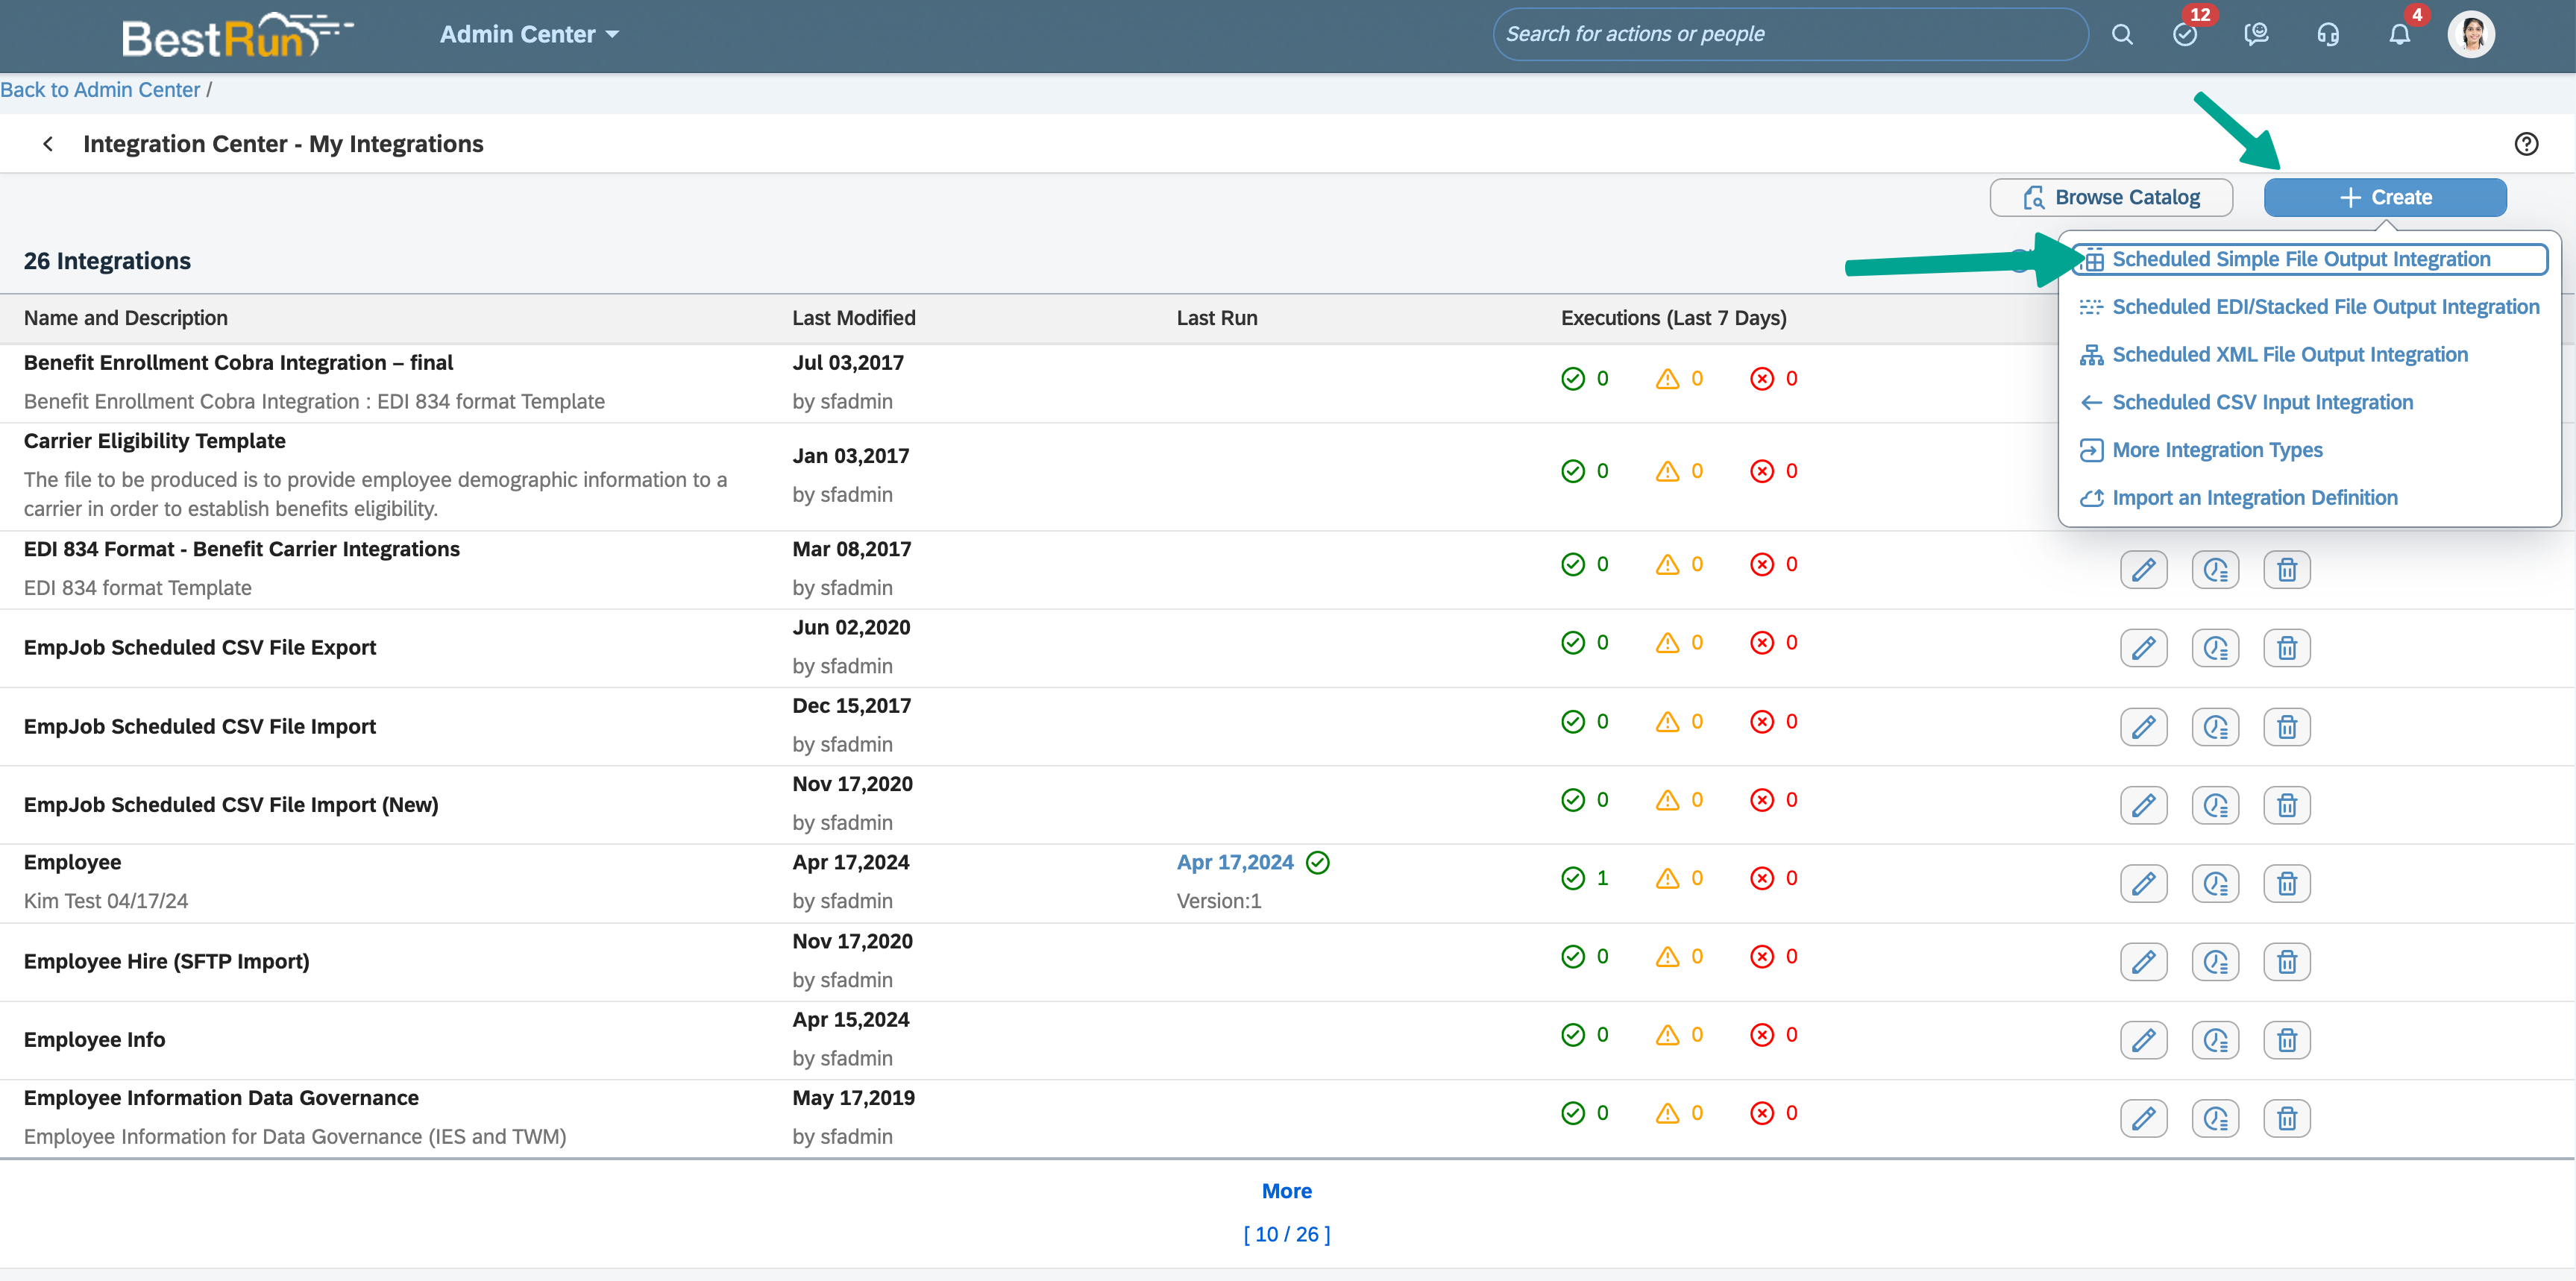
- Click "My Integrations" then "+ Create" in the upper right corner
- Select "Scheduled Simple File Output Integration"
- You may now proceed to Employee information (2a) and Employment information (2b) depending on your specific data requirements.
2a. Create an Employees Report
Assuming you've already followed the setup in Step 2. To generate an Employee Personal Information report, type "PerPersonal" in the Entity Name search field and select Personal Information.
It is required that you include the employee id aka "Person ID External (personIdExternal)" in field 1.
You can find all the fields required for your use case in our SFTP Report Template. Please note that the fields must *exactly* match how they appear in that file.
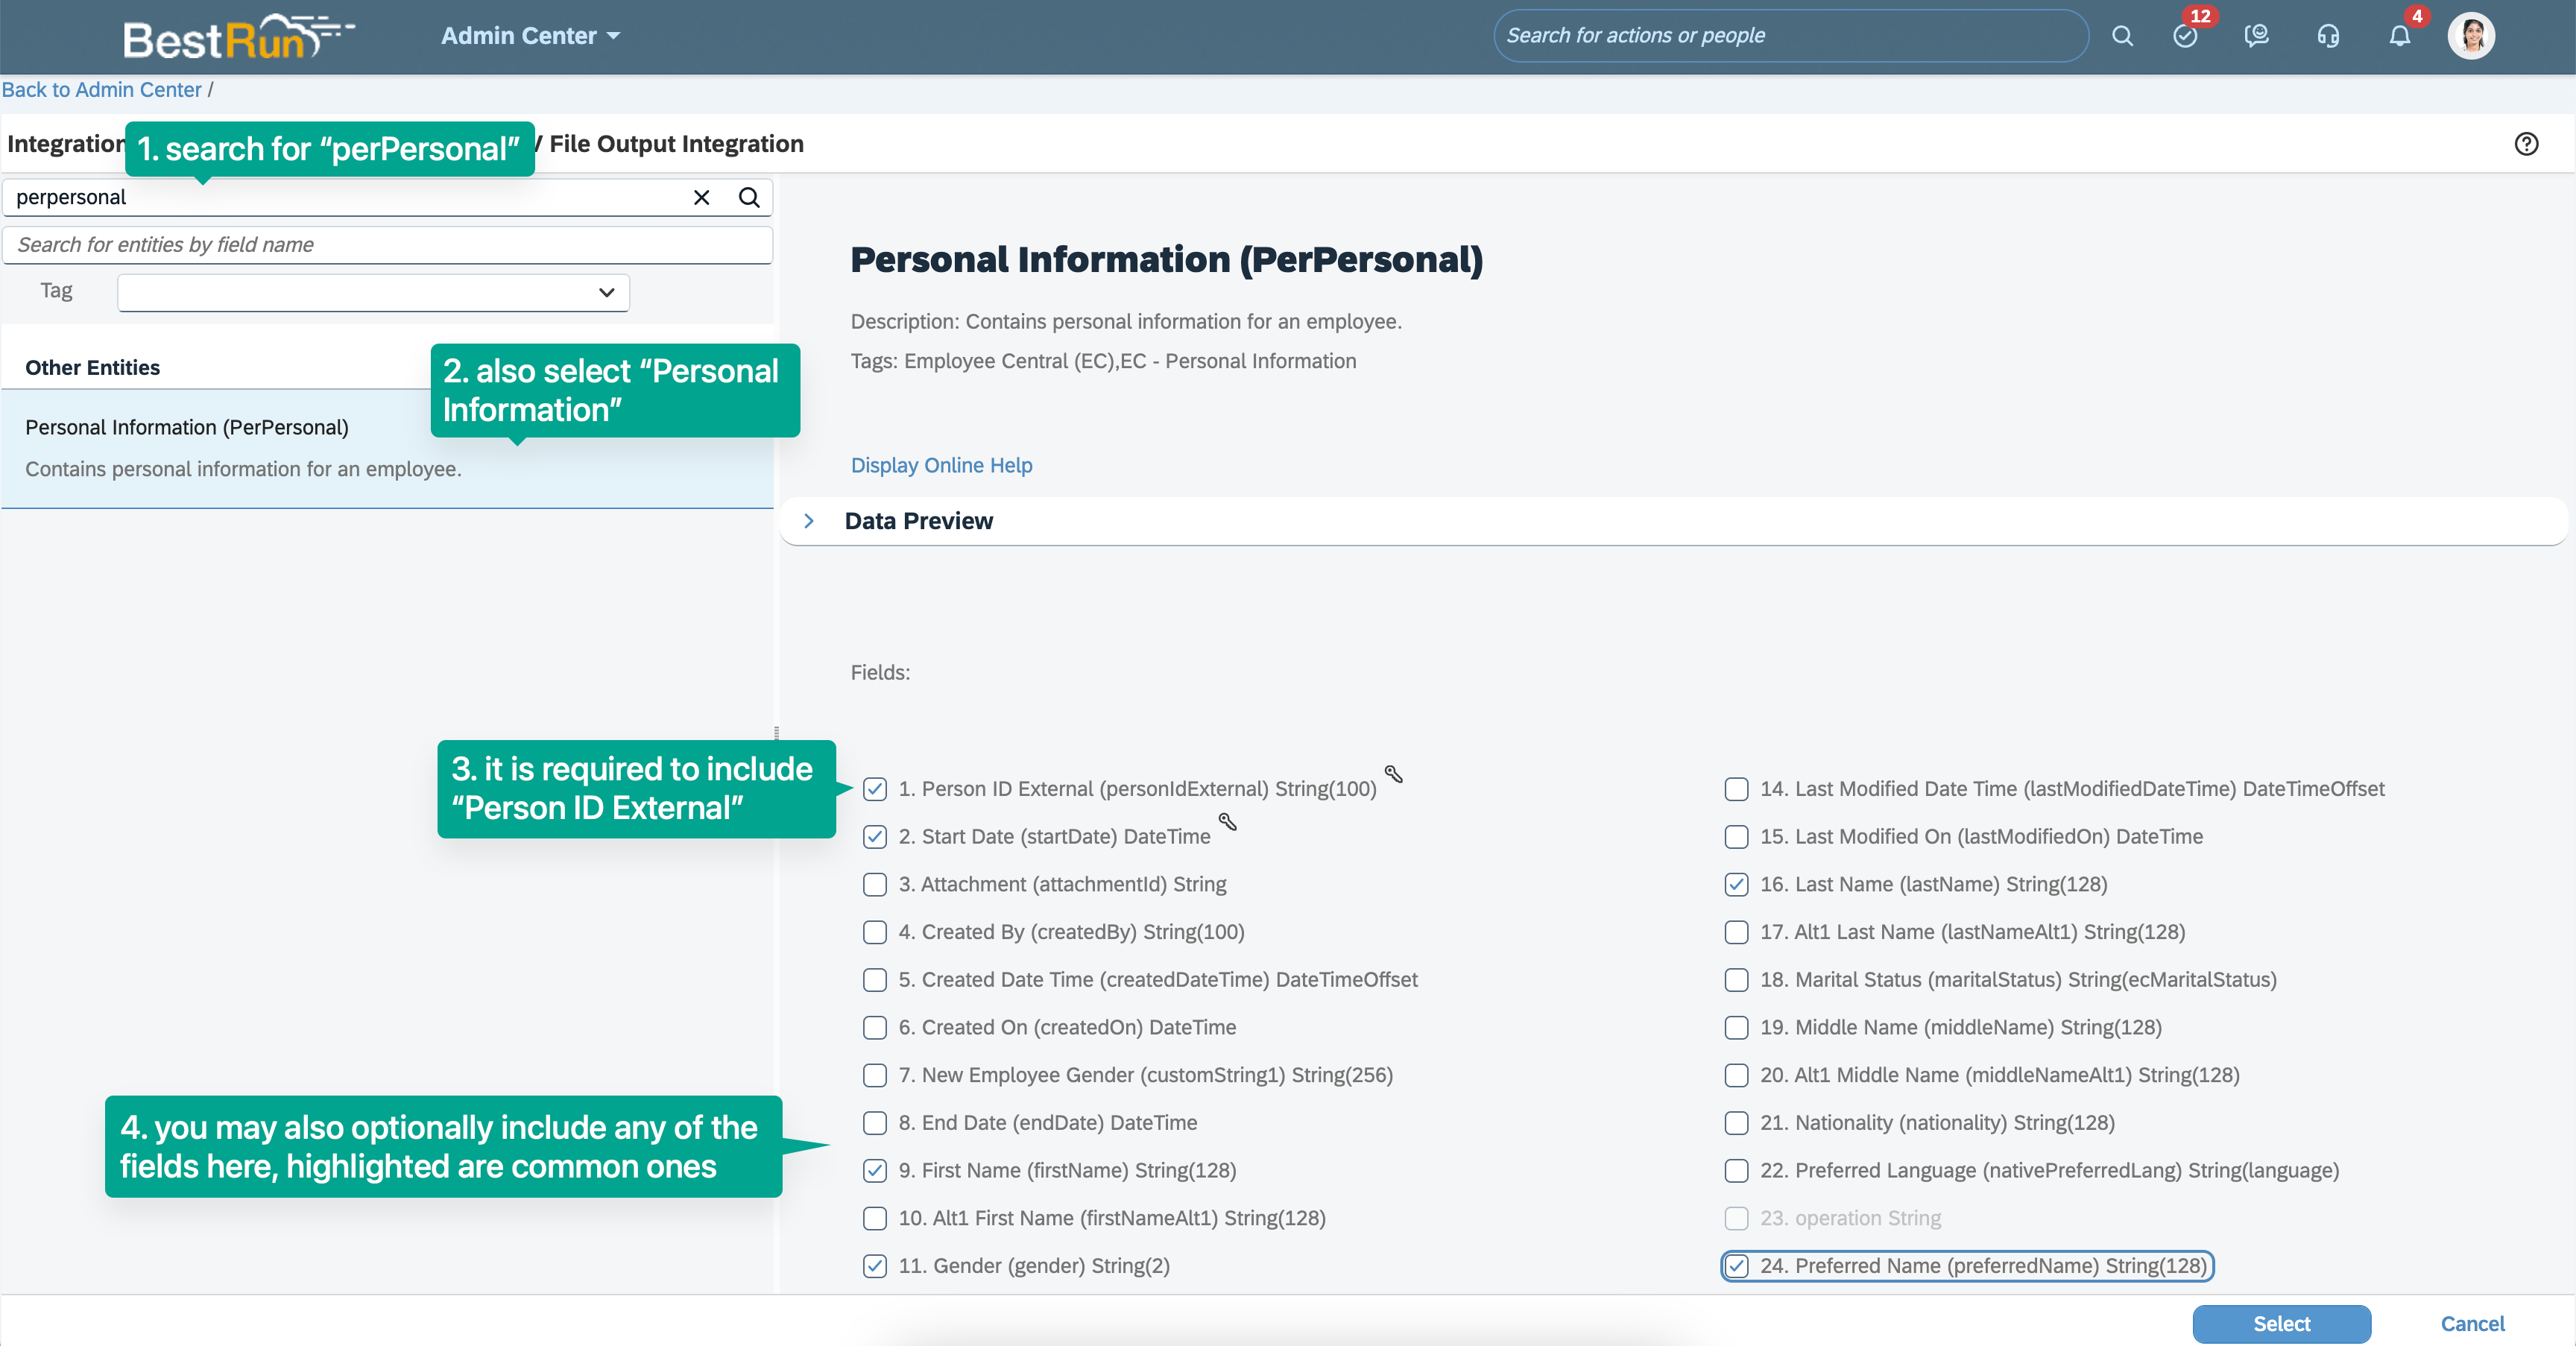
If you don't need any more fields, you may proceed to Step 3.
Optional: If you want to include employee number or employee date of birth, you'll need to access PerPersonal's relational table by checking "personNav" (item 56), see screenshot below.
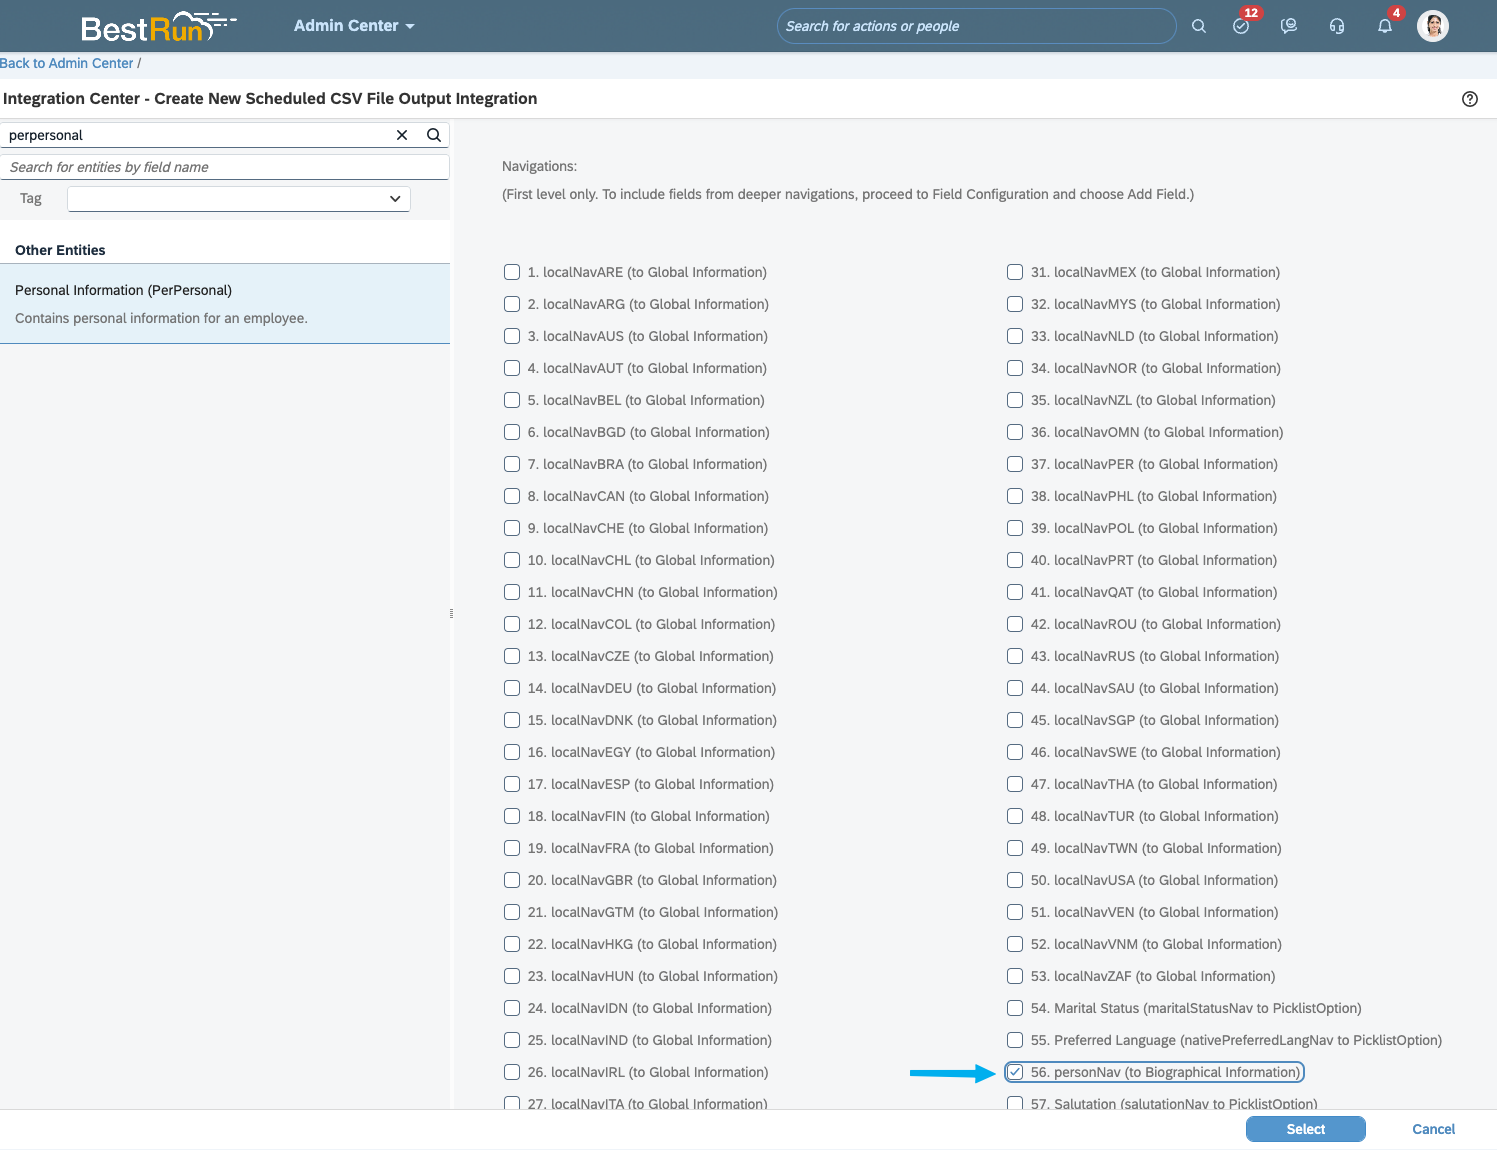
- Once you've added the fields that you need, press Select on the bottom right
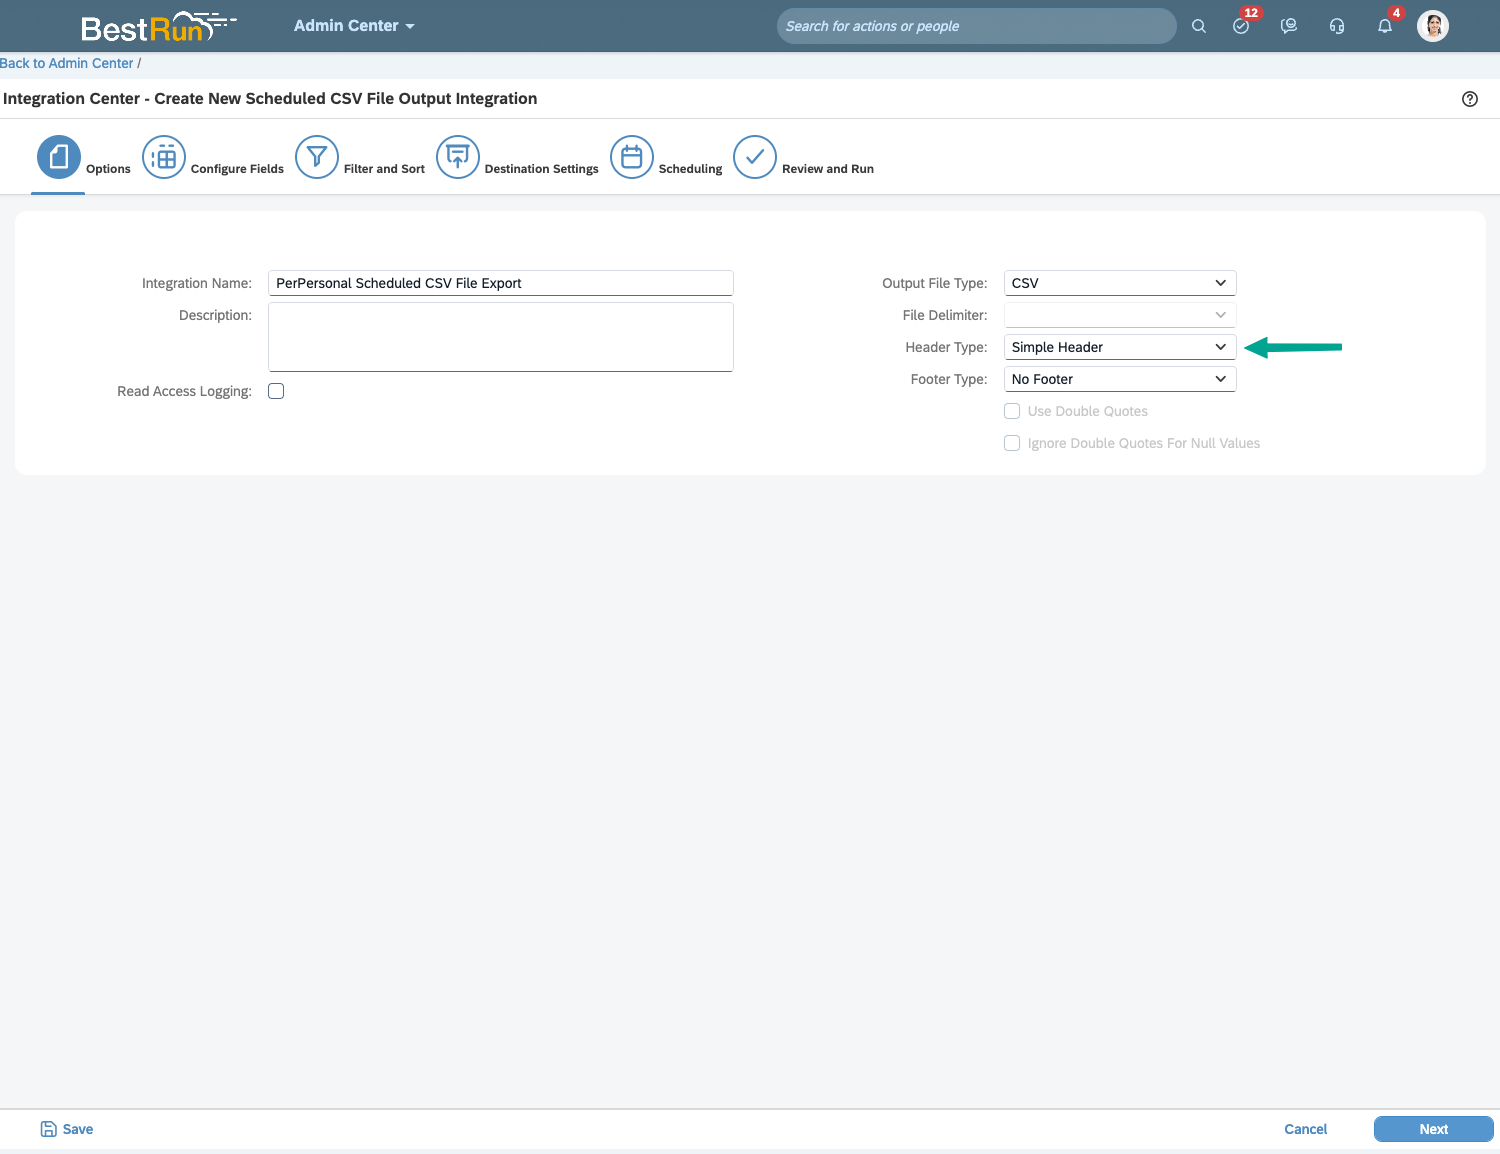
- Set the Report's Header Type to "Simple Header"
- Press next to proceed to "Configure Fields"
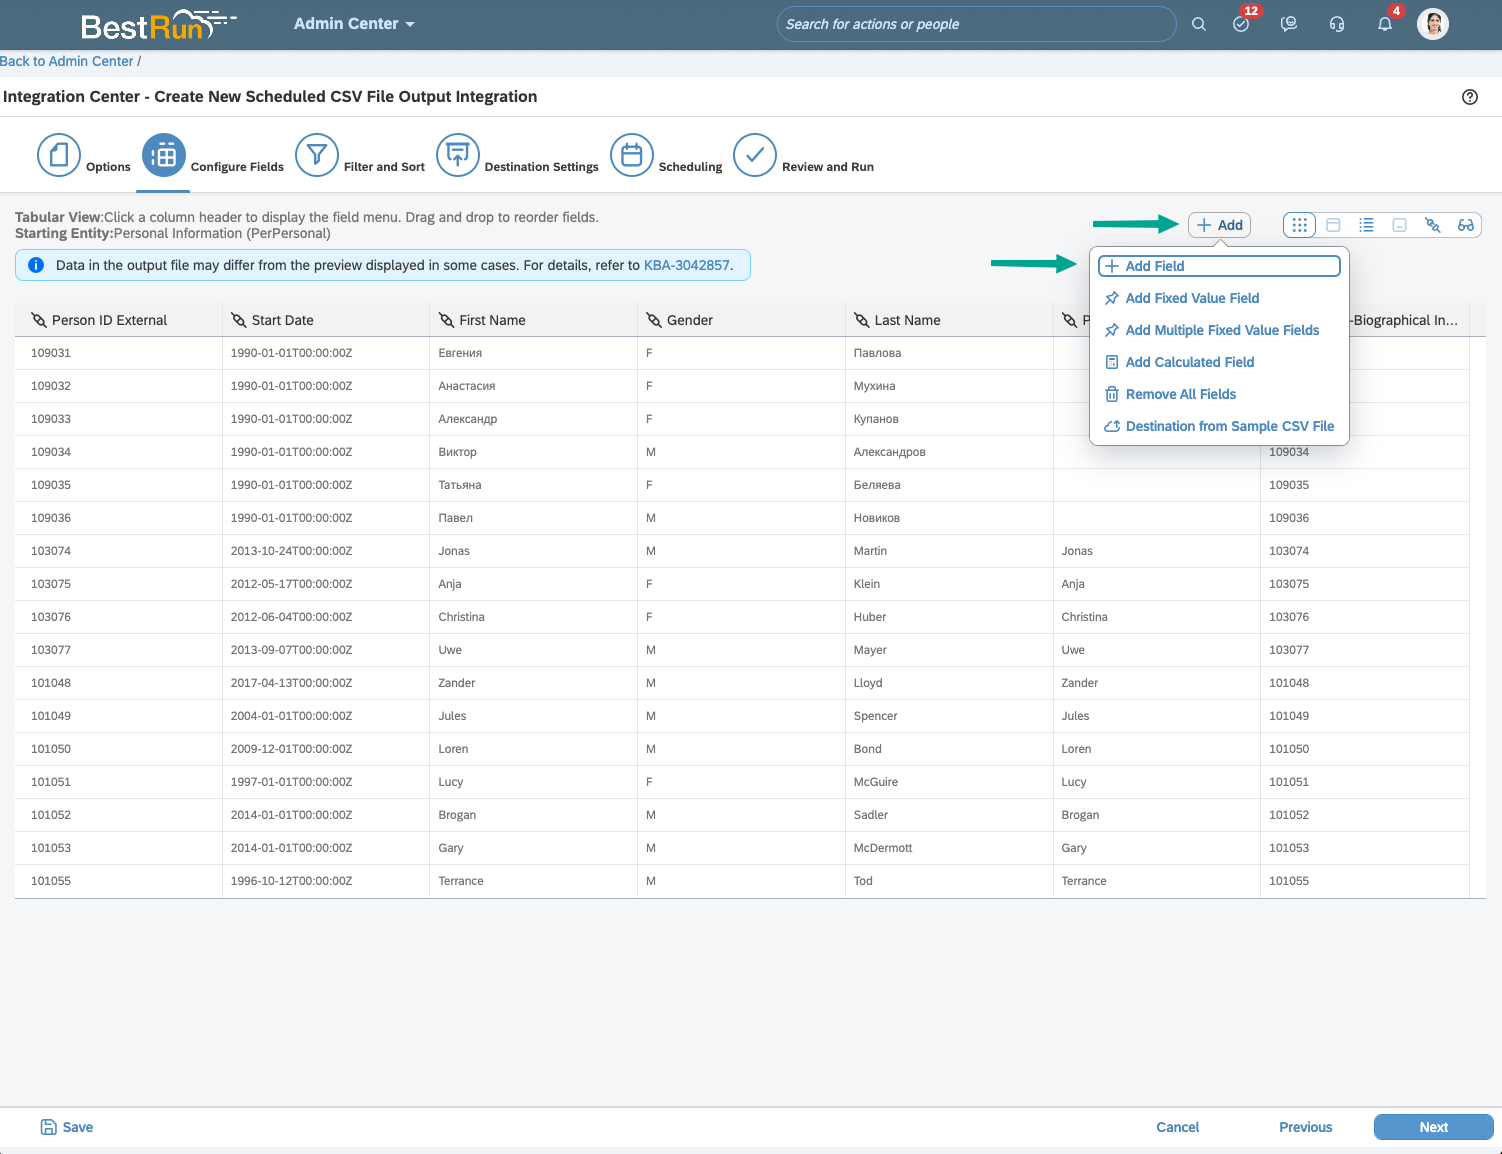
- Click the "+ Add" button
- Add Field" from the dropdown
- "Expand the "Entity Tree View" dropdown
- To add multiple fields at a time, make sure to check the "Add Another" checkbox.
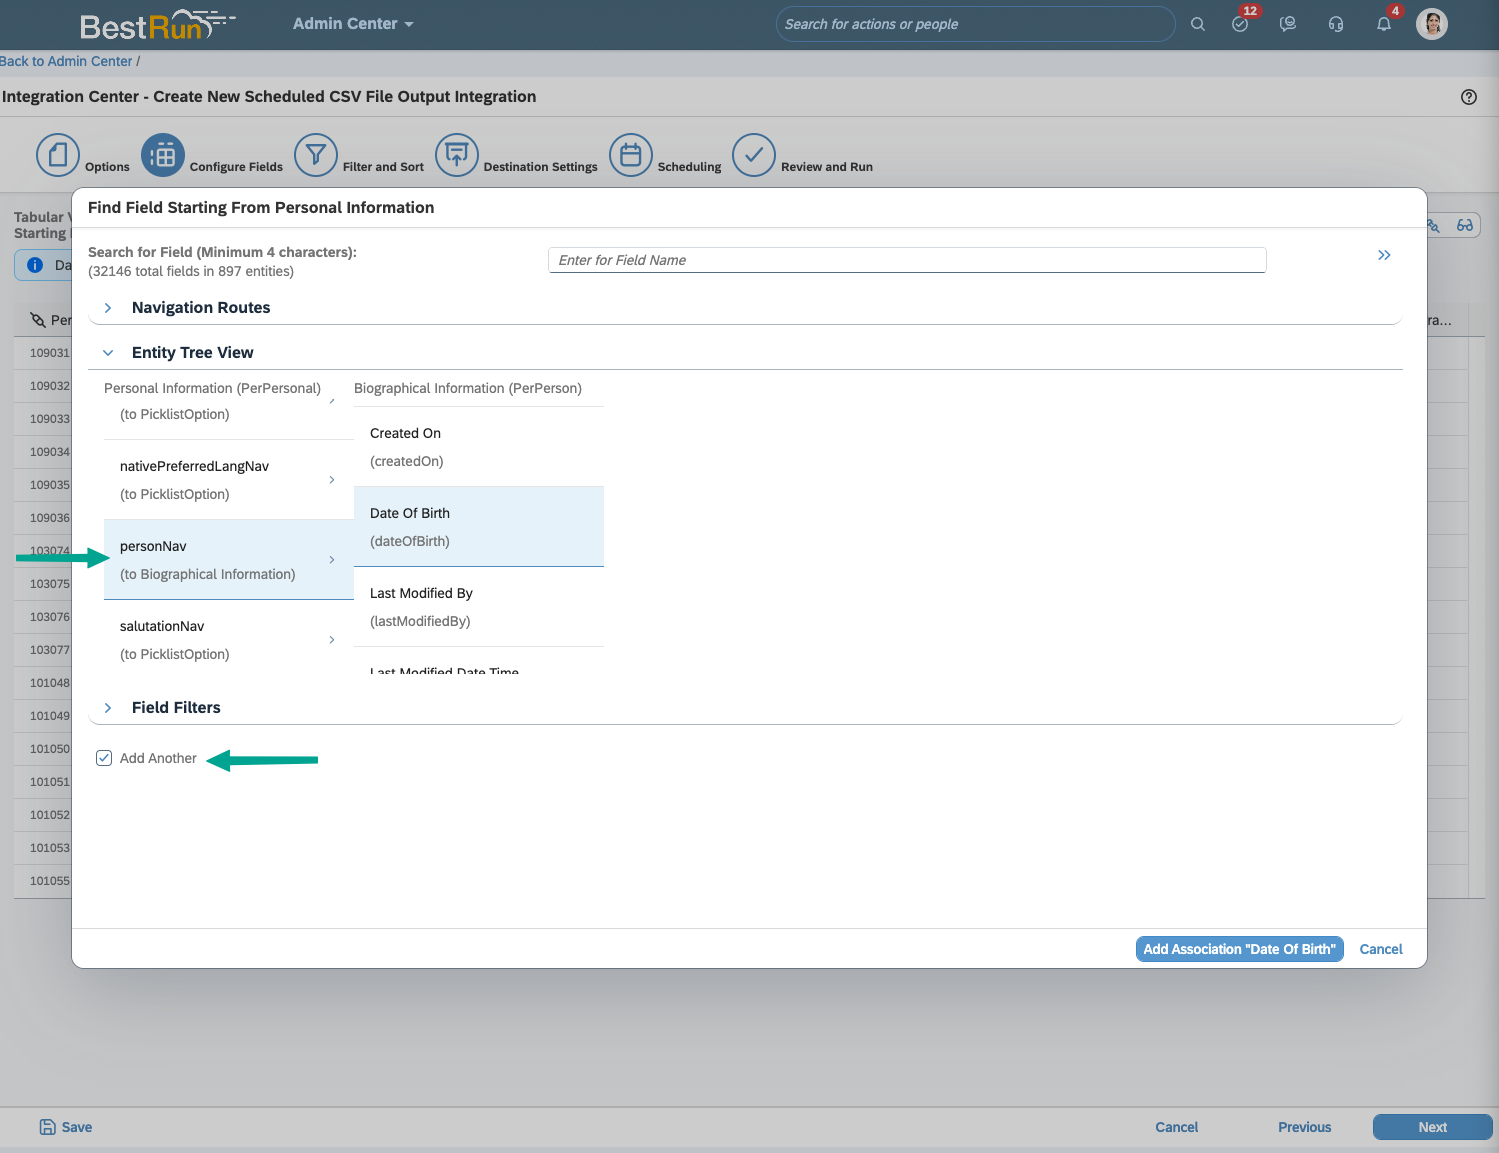
- Now select personNav
- Then select any biographical information that you want to include in your report
- personId
- Date of Birth
- Emails
- In the “Entity Tree View”, select personNav and select emailNav (to Email Information-Business)
- After selecting this field, click the column header and rename the column to Work Email
- Re-navigate to the “Entity Tree View”, select personNav and select emailNav (to Email Information-Personal)
- After selecting this field, click the column header and rename the column to Personal Email
- First Name (rename your column header to this if it's different)
- Last Name (rename your column header to this if it's different)
- Press "cancel" once you're done. Don't worry all of the fields that you added above are automatically saved.
Once you have added all of the fields you need for this Employee Report, press "Next" until you reach Destination Settings. Then follow the instruction in Step 3 of this guide.
Step 3: Setup secure file transfer schedule
In the ContactMonkey Linking modal,
-
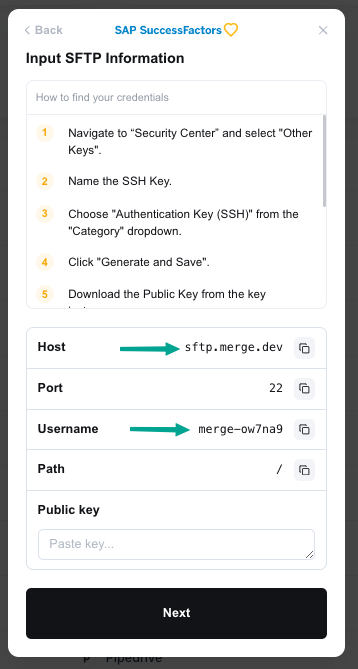
copy the SFTP information required for your SuccessFactors' Destination Settings window
 .
. - Enter the Public Key previously created
- Click Next
- Enter the current date using the format YYYY-MM-DD
- Click Next.
- Click Finish Setup.
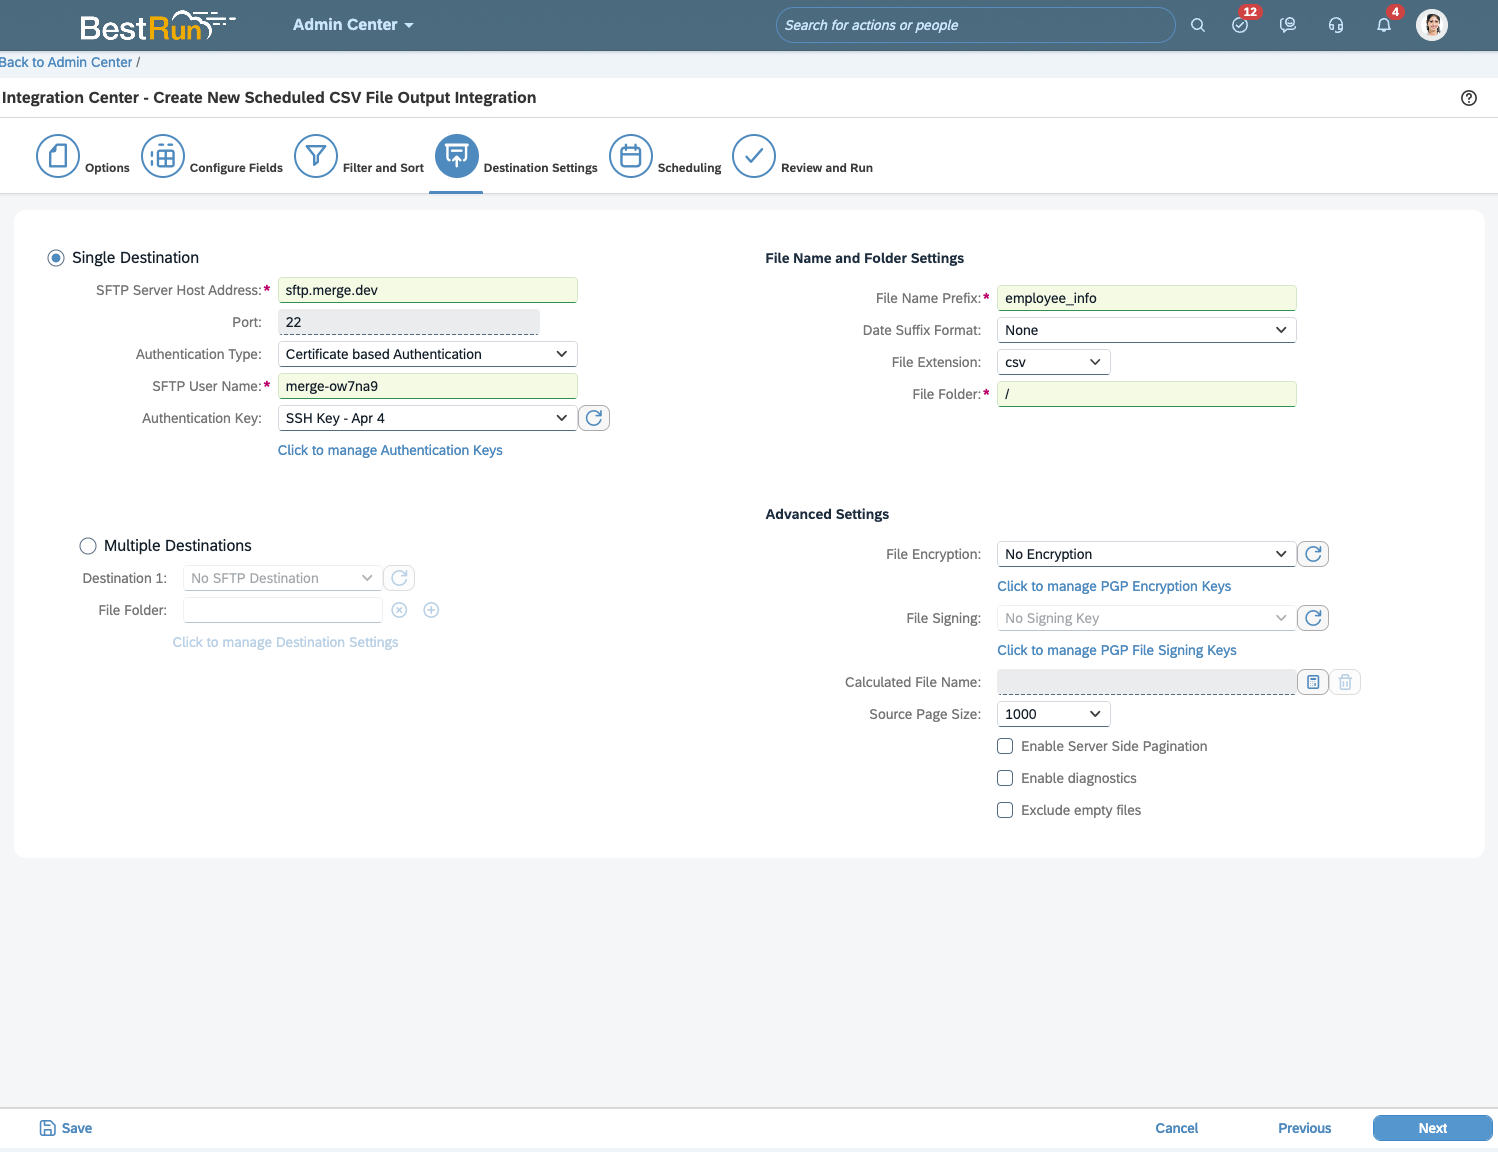
For the following fields, use the unique values (not the necessarily the values in the screenshot) generated by your linking modal.
- SFTP Server Host Address: "Host"
- SFTP User Name: "Username"
- Port: "Port"
- File Folder: "Path"
Then populate the rest of these fields:
- Authentication Type: Certificate based Authentication
- Authentication Key: Select the key generated from Step 1
- File Name Prefix:if you are sending Employee information (2a), use "employee_info"if you are sending Employment information (2b), use "employment_info"
- Date Suffix Format: yyyyMMdd
- File Extension: csv
Set Occurs to the preferred schedule value, then click Next.
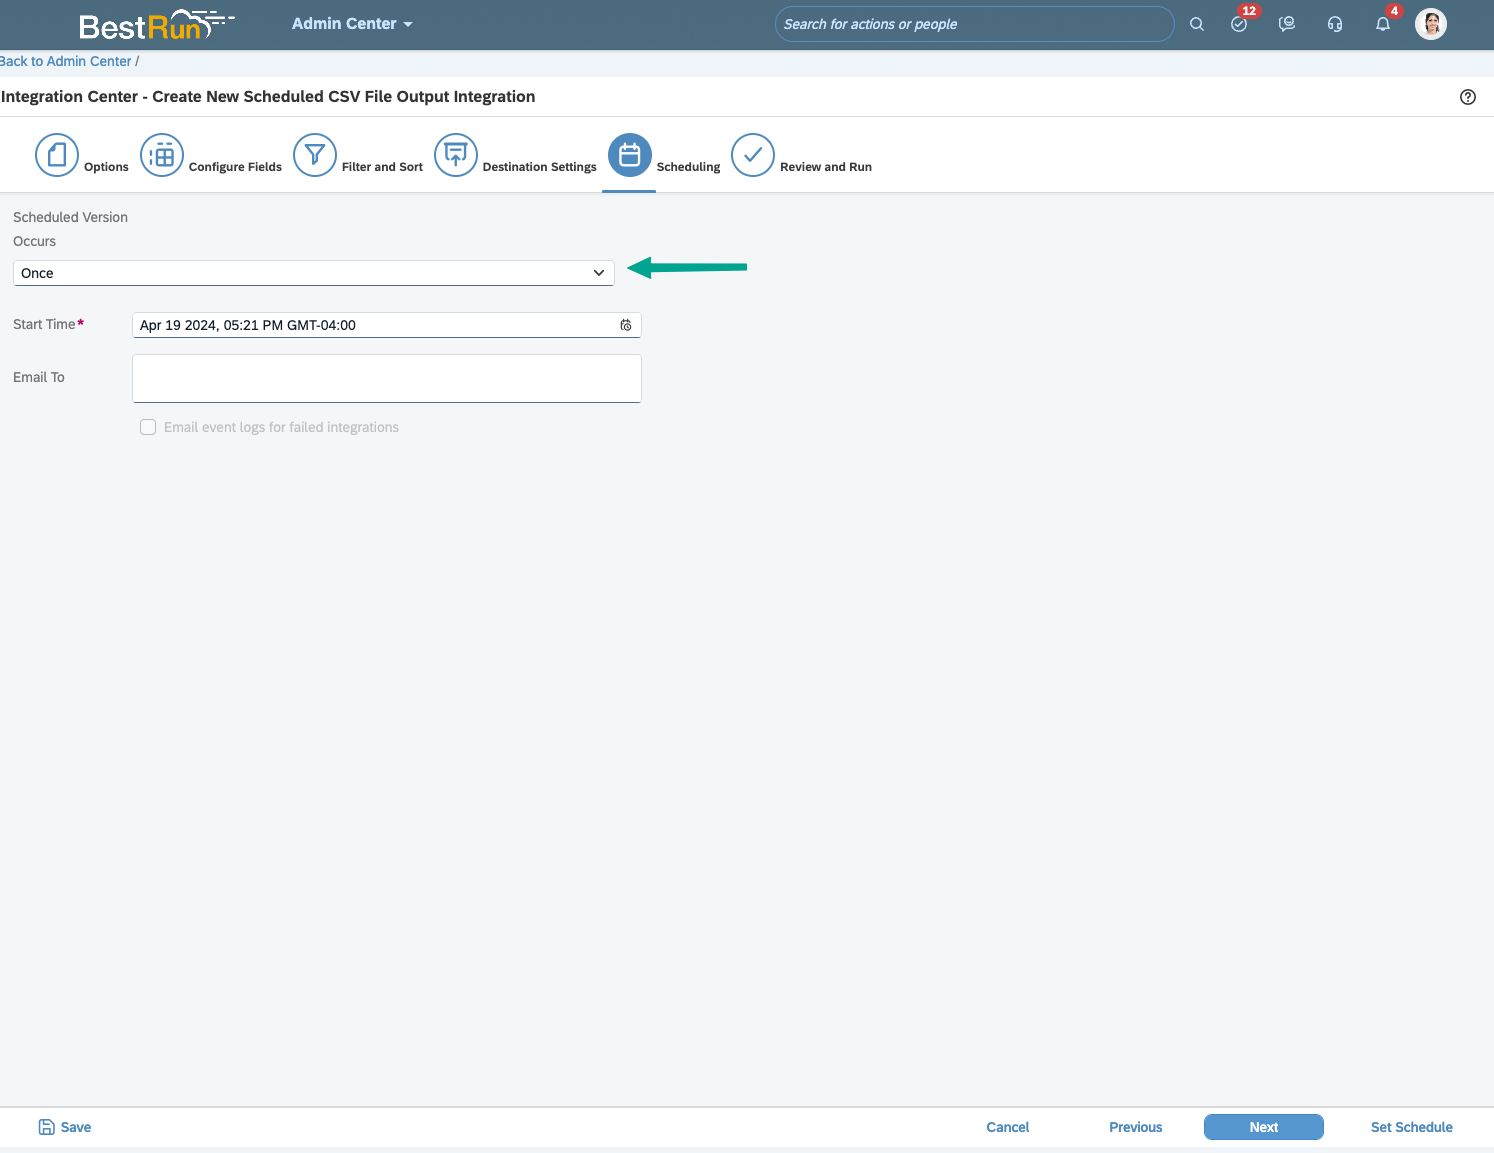
- To send the file immediately select "Run Now"Confirm by clicking "Save and Continue"
- Or for a later scheduled occurrence select "Set Schedule".
- The "Integration Name" has to be unique but you can name it anything
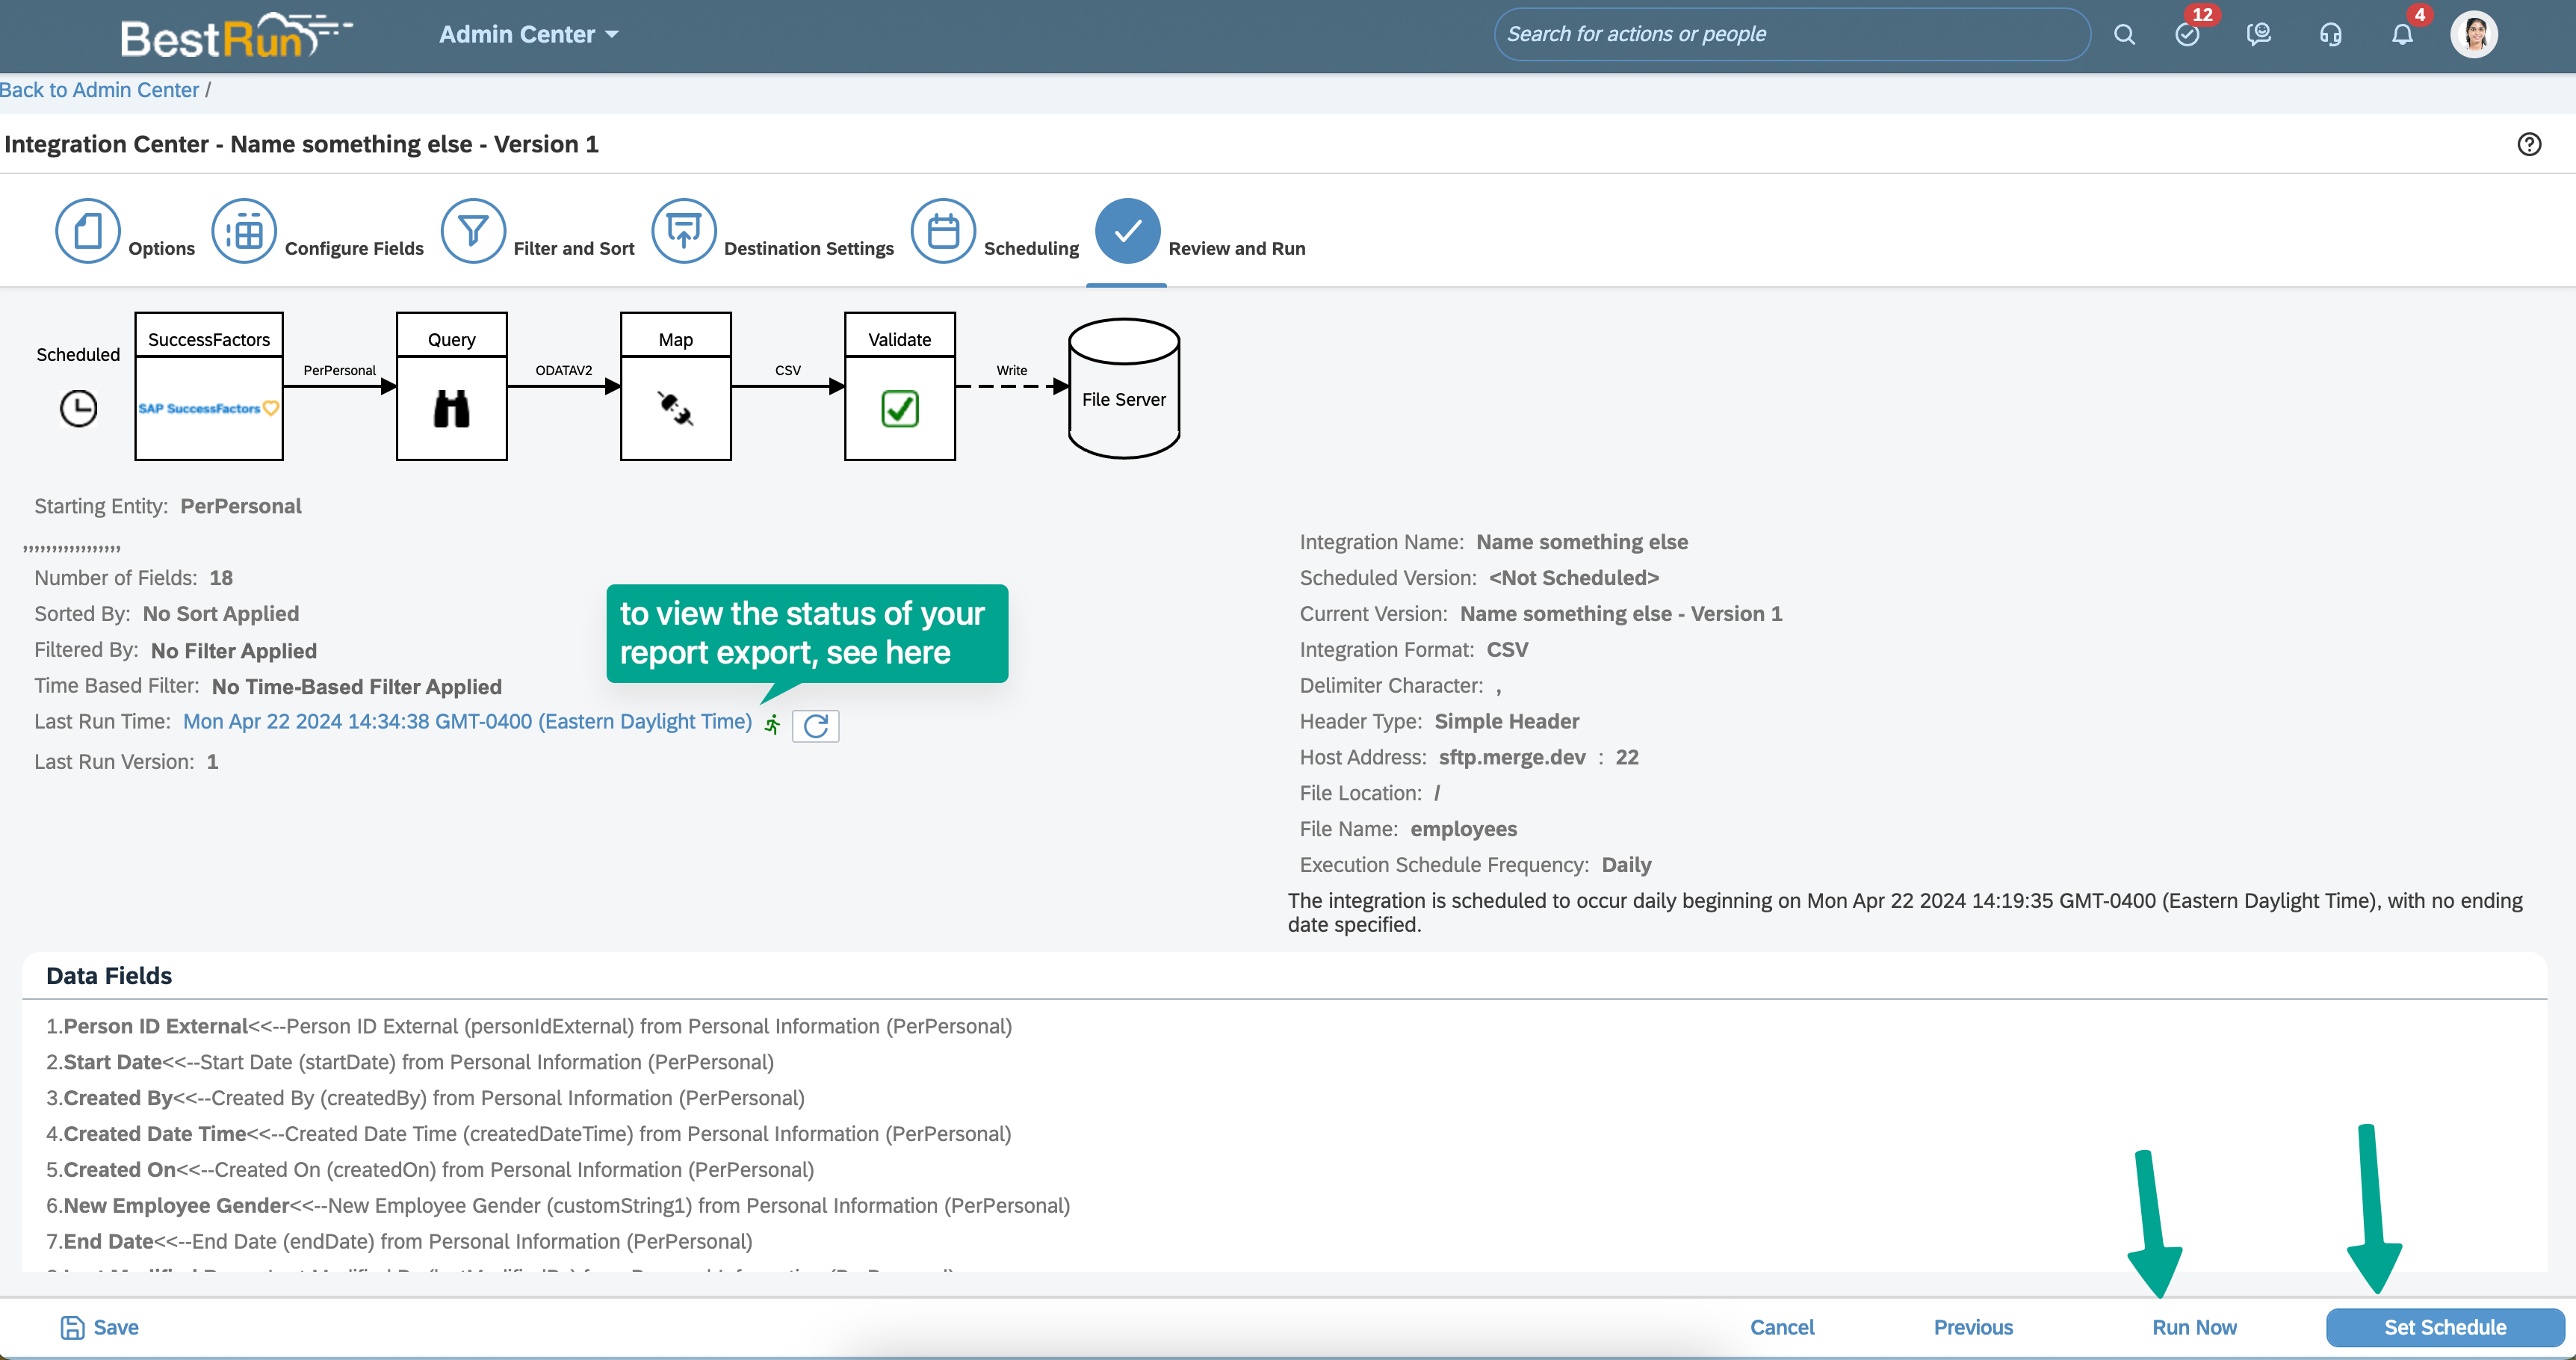
Congrats! Your all done, you will now be receiving files containing employee information, employment information or both at the scheduled occurrence that you set.
Important Notes
PGP public key
If you prefer to send PGP-encrypted files, please find the required public key at the bottom of this page. Note that SFTP (Secure File Transfer Protocol) encrypts all data being transferred, including user authentication and the actual files, even if you do not configure PGP.
MergeAPIKeyRSA.asc